Command Prompt is one of the most powerful tools in Windows; but sadly, it is also the most ignored one. Things were not always like this; but with the advent of GUI based operating systems, people started feeling that computing through command based tools was boring. This ultimately led the command prompt into obscurity.
However, the command prompt is not useless. In fact, it can be pretty useful. This article provides some excellent tricks, secrets and hacks that will make you realize that the Windows Command Prompt is not only useful but also a tool that you should definitely give more respect to.
1-Watch ASCII version of the Star Wars Episode IV movie
Surprised yet? You can watch an ASCII version of the full Star Wars Episode IV Movie right in your command prompt window. Just open command prompt, type a small code and the movie will start playing immediately. Read the complete instructions here.
To watch it on Windows XP, Mac OS X and Linux
On Windows 10, Windows 8, Windows 8.1, Windows 7 and Windows Vista
Telnet is turned off by default in the latest versions of Windows. So, in order to watch star wars, you must first enable telnet by going to Control Panel › Programs › Turn Windows Feature On or Off and ticking both the telnet check boxes. After doing that, follow the steps given below:-

Upon running the bat file, you will see the "Matrix falling code" effect.
Surprised yet? You can watch an ASCII version of the full Star Wars Episode IV Movie right in your command prompt window. Just open command prompt, type a small code and the movie will start playing immediately. Read the complete instructions here.
To watch it on Windows XP, Mac OS X and Linux
- Go to Start, Run. (Only for Windows users)
- Now type "telnet towel.blinkenlights.nl" without the quotes and press Enter. Users of Mac OS X and Linux can directly execute this code in the terminal window.
On Windows 10, Windows 8, Windows 8.1, Windows 7 and Windows Vista
Telnet is turned off by default in the latest versions of Windows. So, in order to watch star wars, you must first enable telnet by going to Control Panel › Programs › Turn Windows Feature On or Off and ticking both the telnet check boxes. After doing that, follow the steps given below:-
- Go to Start, Search in Windows Vista and Windows 7 and Windows 10. On Windows 8 and Windows 8.1, open the main Start page.
- Type telnet and press Enter.
- In the following command prompt window, type "o" without quotes and press Enter.
- Now type "towel.blinkenlights.nl" without the quotes and press Enter.
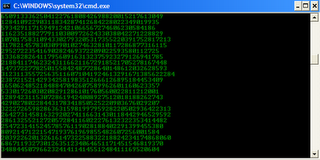
2- Create Matrix falling code effect
Have you watched “The Matrix”? Of course, you have. Then, you already know what I am talking about. In case you still don't know what I mean, take a look at this image! You can create the same effect in command prompt using just a few lines of code. Head over to this post for instructions.Matrix Falling Code Effect - Notepad CMD (.BAT) Tricks
Inspired by the movie Matrix, this falling code trick is extremely popular on social networking websites. Copy and paste the code given below in Notepad and save the file as "Matrix.bat" or *.bat.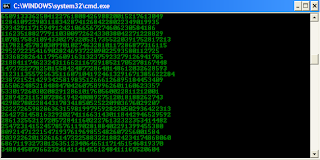 |
| Matrix Falling Code Effect - Notepad Trick |
Upon running the bat file, you will see the "Matrix falling code" effect.
3- Make Folders that you cannot delete
Are you tired of accidentally deleting important folders? Well, if you are, you can learn how to make undeletable folders here.
Basic Concept
The basic concept behind this trick is the use of Keywords. Keywords are reserved words in any programming language that cannot be used as names of variables. Windows also uses certain keywords in its programming. Some of them are con, aux, lpt1, lpt2, lpt3, lpt4, lpt5, lpt6, lpt7, lpt8 and lpt9.

A Test
To test this concept, make a new folder in Windows and try to give it a name same as any keyword mentioned above.
Result
Windows will not rename your folder to any of the keyword given above.
Trick
So the question arises, how can we make a folder with a keyword as its name? The solution to this problem is included in Windows itself. As we know that Windows has evolved from D.O.S.(Disk Operating System), its commands can be used in Windows. You can use D.O.S. Programming in Windows to create a folder with a keyword as its name using the steps given below:-
Now Windows will create an undeletable, unrenamable folder in the drive you entered in Step 3. However, the folder can be renamed to another keyword using Windows Explorer.
Deleting the Folder
Although, it is not possible to manually delete the folder, you can delete the folder by typing "rd con\" or "rd lpt1\" in Step 4 instead of "md con\" or "md lpt1\".
Windows Compatibility: This works on Windows XP, Windows Vista, Windows 7, Windows 8 and Windows 8.1.
Try it yourself to create one such folder which can neither be deleted nor be renamed.
The basic concept behind this trick is the use of Keywords. Keywords are reserved words in any programming language that cannot be used as names of variables. Windows also uses certain keywords in its programming. Some of them are con, aux, lpt1, lpt2, lpt3, lpt4, lpt5, lpt6, lpt7, lpt8 and lpt9.
A Test
To test this concept, make a new folder in Windows and try to give it a name same as any keyword mentioned above.
Result
Windows will not rename your folder to any of the keyword given above.
Trick
So the question arises, how can we make a folder with a keyword as its name? The solution to this problem is included in Windows itself. As we know that Windows has evolved from D.O.S.(Disk Operating System), its commands can be used in Windows. You can use D.O.S. Programming in Windows to create a folder with a keyword as its name using the steps given below:-
- Click on Start.
- Click on Run. Type in "cmd" without quotes.
- In the Command Prompt Window that opens, type the name of the drive you wish to create your folder in the format <drive-name>: and press Enter. e.g. If you wish to create the undeletable folder in D drive, type "D:" without the quotes. Note that the folder cannot be created in the root of C: drive (if C: is your system drive).
- Type this command- "md con\" or "md lpt1\" without the quotes and press Enter. You can choose any of the keywords given above as the name of your folder.
Now Windows will create an undeletable, unrenamable folder in the drive you entered in Step 3. However, the folder can be renamed to another keyword using Windows Explorer.
Deleting the Folder
Although, it is not possible to manually delete the folder, you can delete the folder by typing "rd con\" or "rd lpt1\" in Step 4 instead of "md con\" or "md lpt1\".
Windows Compatibility: This works on Windows XP, Windows Vista, Windows 7, Windows 8 and Windows 8.1.
Try it yourself to create one such folder which can neither be deleted nor be renamed.
4- Shutdown your computer giving a funny reason
What if your computer shuts down saying that it is tired and doesn't want to work anymore? It would be fun, wouldn't it? You can do so by reading the instructions here.
Initial Steps
1) Press Windows Key + R.
2) Enter CMD and press Enter.
This will start the command prompt. Follow the instructions below depending on what you want to do.
Shutdown Local Machine (Your Computer)
Type "shutdown -s" without the quotes in the command prompt and press Enter. Shutdown is the command being executed and the switch -s tells the computer to shutdown.
Restart your Local Computer
Type "shutdown -r" in the command prompt and press Enter. In this case, the command switch -r is telling the computer to restart after shutdown.
Log Off the Current User
Type "shutdown -l" in the command prompt and press Enter. The -l command switch tells the computer to log off.
Shutdown a Remote Computer
Type "shutdown -s -m \\name of the computer" in the command prompt and press Enter. Replace \\name of the computer with the actual name of the remote computer you are trying to shutdown. As mentioned earlier, you must have administrative access to the computer you are trying to shutdown. To know if you have administrative access, press Windows key + R and then type the name of the computer and press Enter.
Note: If you don't remember the name of the remote computer, you can look for it by opening a list of all the computers you are connected to by executing "net view" in command prompt.
If you can connect to the computer, you will be asked to login with your username and password. Upon entering them, a window will display the list of all the directories available to you. This should help you know whether you can or cannot shutdown the remote computer.
Hibernate a Local Computer
Type in "Rundll32.exe Powrprof.dll,SetSuspendState" without the quotes and press Enter. Your computer should hibernate, if it does not, then you must enable hibernation to do this.
Shutdown your or a remote computer after a specific time
Type "shutdown -s -t 60" to shutdown your computer after 60 seconds. Upon executing this, a countdown timer displaying a warning message will be shown. This command uses the -t command switch followed by a variable (which is 60 in this case) which represents the number of seconds after which the computer will shutdown.
Display a Message containing the reason for shutdown
Type shutdown -s -t 500 -c "I am tired. I don't want to work anymore." (with the quotes) in the Command Prompt and press Enter. The -c switch is used in the code to give the reason for shutting down and what is followed in quotes will be displayed in the dialog box as the reason. This can be used to display all sorts of funny messages. One example :-
Skynet has become self aware. John Connor did not stop me. You can not use your PC anymore.
Stop a System Shutdown
Type "shutdown -a" and press Enter. This will stop the system from shutting down if the countdown to shut down has not reached 0.
 Command Prompt can let you know if someone is connected to your Local Area Connection and using it. Just follow the steps:-
1) Open your browser and visit http://192.168.1.1 or http://192.168.0.1 depending on your router.
2) Find the tab that mentions “Attached Devices” or something similar.
3) Find the computer name, IP address and MAC Address (sometimes called Physical Address or Hardware Address) of your computer using the previous trick.
4 )Compare it with those displayed by your router in Step 2. If you notice some strange devices, then your neighbour has been sneaking in on your internet connection and it is best to add a password.
 Want to know if someone is hacking your computer? Command Prompt can help you find if someone you don't know is connected to your computer stealing private data. Just execute netstat -a and the command prompt will return a list of computers that your computer is connected to. In the results returned, Proto column gives the type of data transmission taking place (TCP or UDP) , Local address column gives the port with which your computer is connected to an external computer and the Foreign Address column gives the external computer you are connected to along with the port being used for the connection. State gives the state of the connection (whether a connection is actually established, or waiting for transmission or is “Timed Out”).
These tricks work on Windows 10, Windows 8.1, Windows 8, Windows 7, Windows Vista, Windows XP and all previous versions of Windows.
1) Press Windows Key + R.
2) Enter CMD and press Enter.
This will start the command prompt. Follow the instructions below depending on what you want to do.
Shutdown Local Machine (Your Computer)
Type "shutdown -s" without the quotes in the command prompt and press Enter. Shutdown is the command being executed and the switch -s tells the computer to shutdown.
Restart your Local Computer
Type "shutdown -r" in the command prompt and press Enter. In this case, the command switch -r is telling the computer to restart after shutdown.
Log Off the Current User
Type "shutdown -l" in the command prompt and press Enter. The -l command switch tells the computer to log off.
Shutdown a Remote Computer
Type "shutdown -s -m \\name of the computer" in the command prompt and press Enter. Replace \\name of the computer with the actual name of the remote computer you are trying to shutdown. As mentioned earlier, you must have administrative access to the computer you are trying to shutdown. To know if you have administrative access, press Windows key + R and then type the name of the computer and press Enter.
Note: If you don't remember the name of the remote computer, you can look for it by opening a list of all the computers you are connected to by executing "net view" in command prompt.
If you can connect to the computer, you will be asked to login with your username and password. Upon entering them, a window will display the list of all the directories available to you. This should help you know whether you can or cannot shutdown the remote computer.
Hibernate a Local Computer
Type in "Rundll32.exe Powrprof.dll,SetSuspendState" without the quotes and press Enter. Your computer should hibernate, if it does not, then you must enable hibernation to do this.
Shutdown your or a remote computer after a specific time
Type "shutdown -s -t 60" to shutdown your computer after 60 seconds. Upon executing this, a countdown timer displaying a warning message will be shown. This command uses the -t command switch followed by a variable (which is 60 in this case) which represents the number of seconds after which the computer will shutdown.
Display a Message containing the reason for shutdown
Type shutdown -s -t 500 -c "I am tired. I don't want to work anymore." (with the quotes) in the Command Prompt and press Enter. The -c switch is used in the code to give the reason for shutting down and what is followed in quotes will be displayed in the dialog box as the reason. This can be used to display all sorts of funny messages. One example :-
Skynet has become self aware. John Connor did not stop me. You can not use your PC anymore.
Stop a System Shutdown
Type "shutdown -a" and press Enter. This will stop the system from shutting down if the countdown to shut down has not reached 0.
5- Know your IP address, DNS Server's address and a lot more about your Internet Connection
Command Prompt can even let you know your IP address. Just type ipconfig/ all in the command prompt and press Enter. Along with your IP address and DNS servers, command prompt will also return a ton of information like your host name, primary DNS suffix, node type, whether IP Routing ,Wins Proxy, and DHCP are enabled, your network adapter's description, your physical (MAC) address etc .6- Know if your neighbours are stealing your WiFi connection
1) Open your browser and visit http://192.168.1.1 or http://192.168.0.1 depending on your router.
2) Find the tab that mentions “Attached Devices” or something similar.
3) Find the computer name, IP address and MAC Address (sometimes called Physical Address or Hardware Address) of your computer using the previous trick.
4 )Compare it with those displayed by your router in Step 2. If you notice some strange devices, then your neighbour has been sneaking in on your internet connection and it is best to add a password.
7- Know if someone is hacking your computer/ Trace a Hacker
These tricks work on Windows 10, Windows 8.1, Windows 8, Windows 7, Windows Vista, Windows XP and all previous versions of Windows.
EmoticonEmoticon